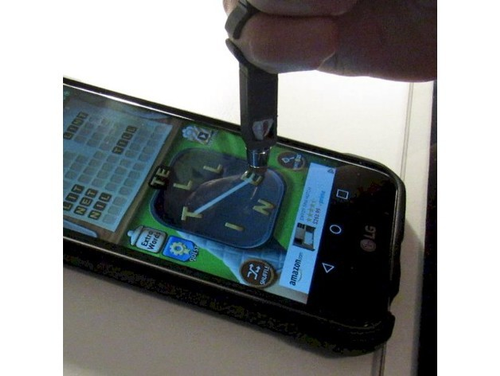
Sixth-Finger / Sixth-Toe Capacitive Stylus
This design was inspired by a request posted to the ATMakers.org page on Facebook for a way to make a capacitive stylus that could be used by people with limited finger control.
Summary
This design was inspired by a request posted to the ATMakers.org page on Facebook for a way to make a capacitive stylus that could be used by people with limited finger control. When I asked the poster to describe the device further I was pointed to a commercial device available on Amazon called the Sixth Digit by Handizap Capacitive Touchscreen Finger Stylus Ring ([https://www.amazon.com/Handizap-Capacitive-Touchscreen-Finger-Stylus/dp/B016X2GMZK](https://www.amazon.com?tag=tv-auto-20)). I read through the comments of customers who had purchased the product and found that there were some fundamental issues with the design:
• “Couldn't get them to stop rotating around my finger and you can't squeeze them to tight because it'll cut the circulation off in you pinky finger. Just the little bit I did use them I noticed that whatever the tip was made of it had already started to wear out pretty fast.”
• “Worthless. They spin around your finger. At 2 for $30 I laughed at myself at how I got ripped off. Looks like something you would get out of a gumball machine. Don't waste your money.”
• “Good idea but ring won't stay tight on finger”
I chose a design that would mount to both the user’s little finger and ring finger to prevent the rotation and found some high quality capacitive tips ([https://www.amazon.com/gp/product/B074XVH3JP/ref=oh_aui_detailpage_o08_s00?ie=UTF8&psc=1](https://www.amazon.com?ie=UTF8&psc=1&tag=tv-auto-20)) for about $0.60 apiece. I experimented with using a simple bolt as a conductor from the tip to the user’s finger as well as special conductive PLA from ProtoPasta ([https://www.amazon.com/gp/product/B01BDL4BY0/ref=oh_aui_detailpage_o04_s00?ie=UTF8&psc=1](https://www.amazon.com?ie=UTF8&psc=1&tag=tv-auto-20)). Both solutions work well and cost about the same - $1.00 to $1.50 per stylus, which is a savings of about $12 over the commercial product.
The bolted stylus requires a 5 mm hex head bolt and two hex nuts. [The length of the bolt depends on the length of the desired stylus.] The conductive stylus requires only a single hex nut and the post can be arbitrarily long (or short).
For greater customization, the post of the stylus is a separate component as is each of the rings so each component can be printed out of a different filament and each ring can have a different diameter to better fit the user’s fingers. I have included simple sizing rings that can be printed and tried before selecting a particular sized final ring to slice and print. I provide STL files for the posts in a variety of lengths and STL for the rings in a variety of internal diameters from 10 mm to 30 mm.
Finally, I discovered that, by simply rotating the mounting point of certain ring types about 90 degrees, the same fundamental design could be used to attach the stylus to an individual’s foot. The larger diameter rings are particularly useful for that application.
You can get detailed information about the process for selecting components and assembling each stylus by visiting our web page ([https://wp.me/P9evBA-25](https://wp.me/P9evBA-25)).
Note that everything you need for 3D printing is included in the ZIPX file. Ignore the STL files included on this page, They are just for illustration.
Enjoy!
Sixth Finger Stylus in action: [https://youtu.be/vL_oSGm0IBw](https://youtu.be/vL_oSGm0IBw)
Sixth Toe Stylus in action: [https://youtu.be/TNfXjLh_Skw](https://youtu.be/TNfXjLh_Skw)
A very long stylus made of conductive filament: [https://youtu.be/esuzNmWnNLg](https://youtu.be/esuzNmWnNLg)
Print Settings
Printer Brand:
Prusa
Printer:
[i3 MK3](http://amzn.to/2rqZ6Uo)
Rafts:
No
Supports:
No
Resolution:
0.1 mm
Infill:
20%
Notes:
I had to use glue stick in addition to the PEI coating on the print surface in order to get the rings to stick - particularly the sizing rings.
 Open Assistive
